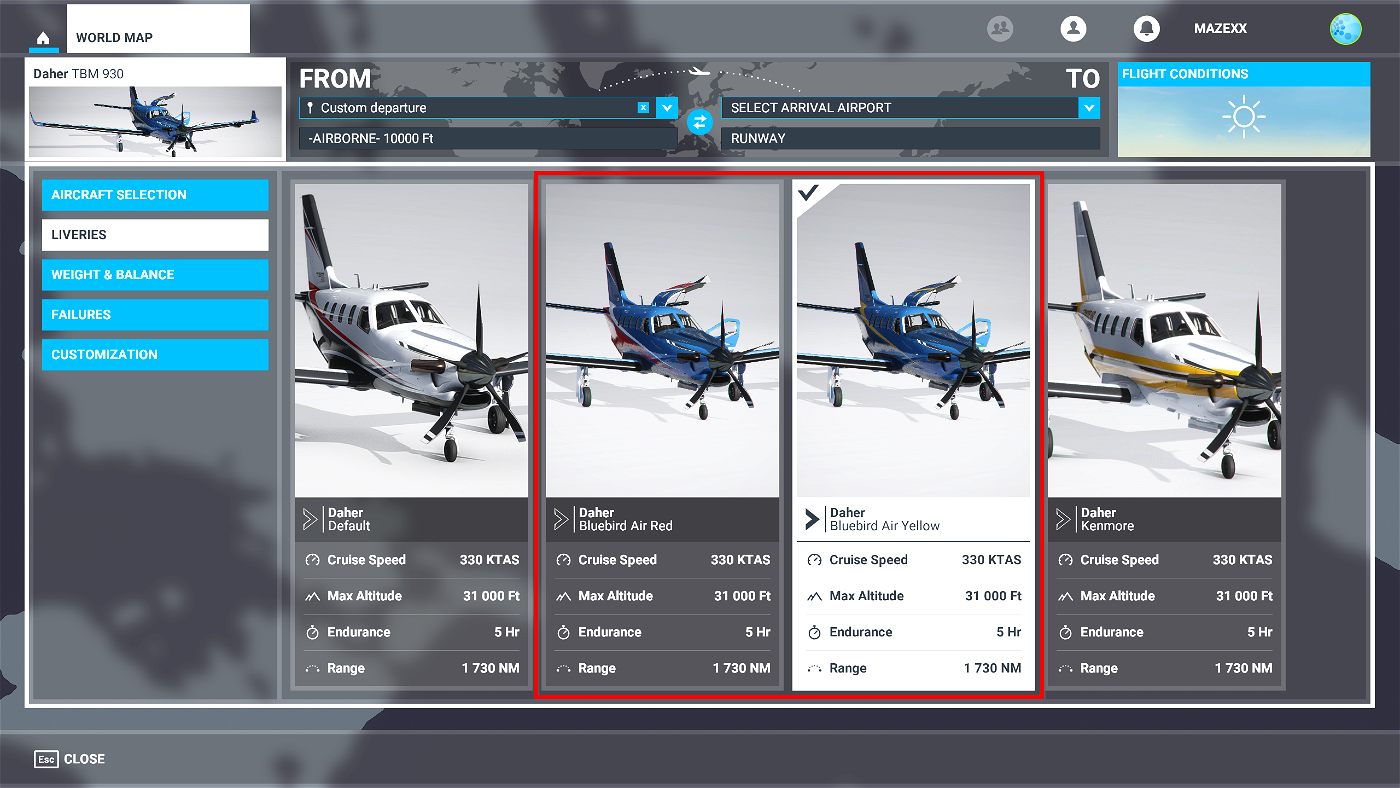
Note: If you dowloaded version 1.0 you can remove the folder "livery-tbm930-mazex" from your Community folder. It will not collide but I renamed the original one to Bluebird Yellow so you will have a duplicate of the yellow one called just "Bluebird"...
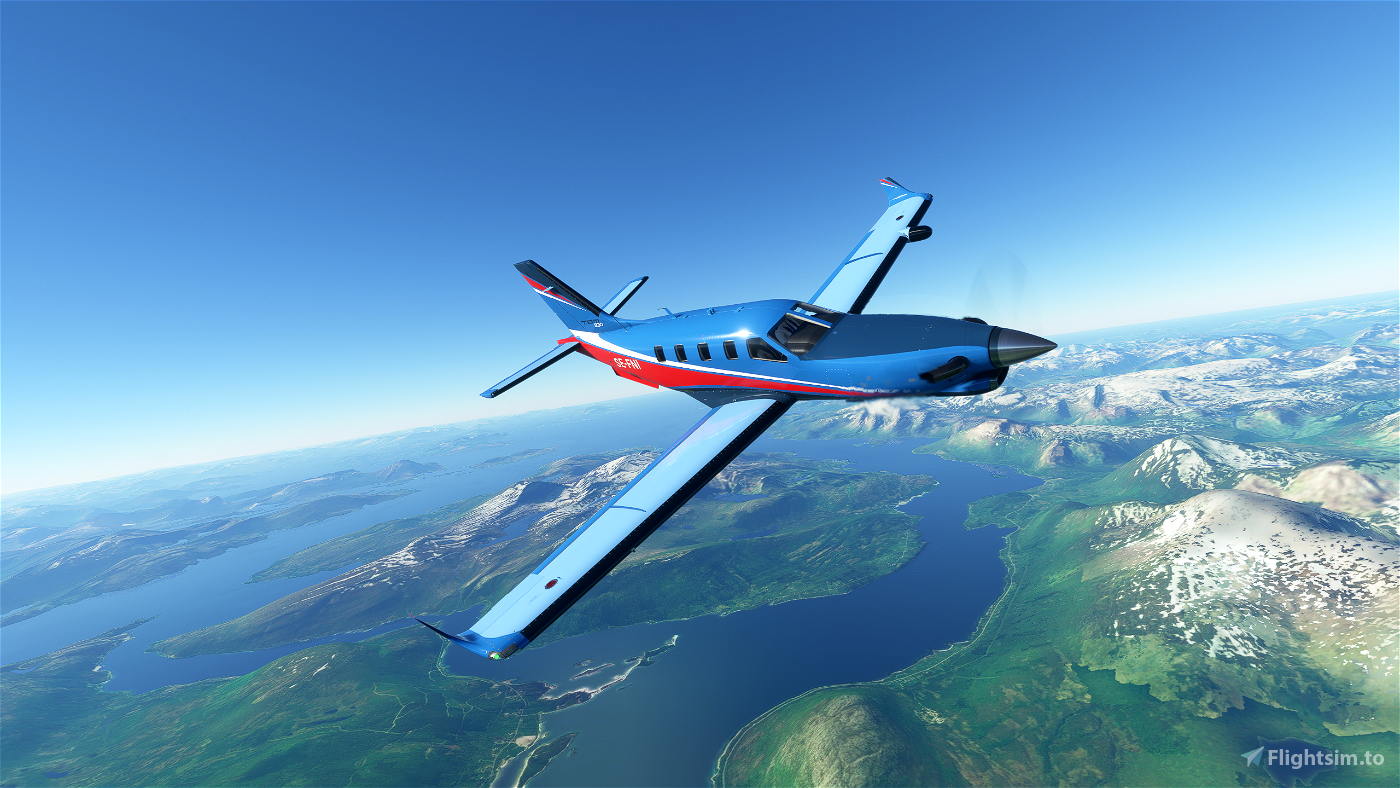
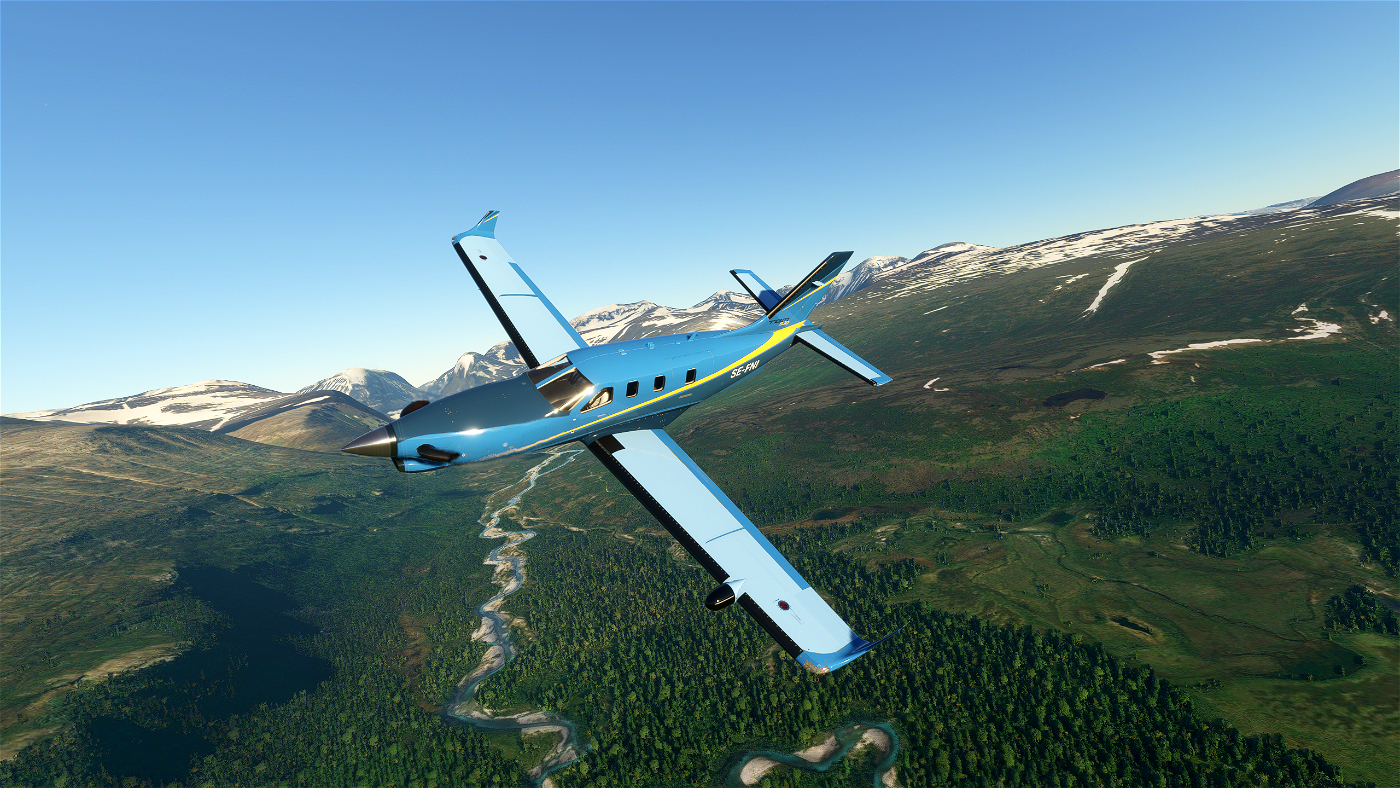
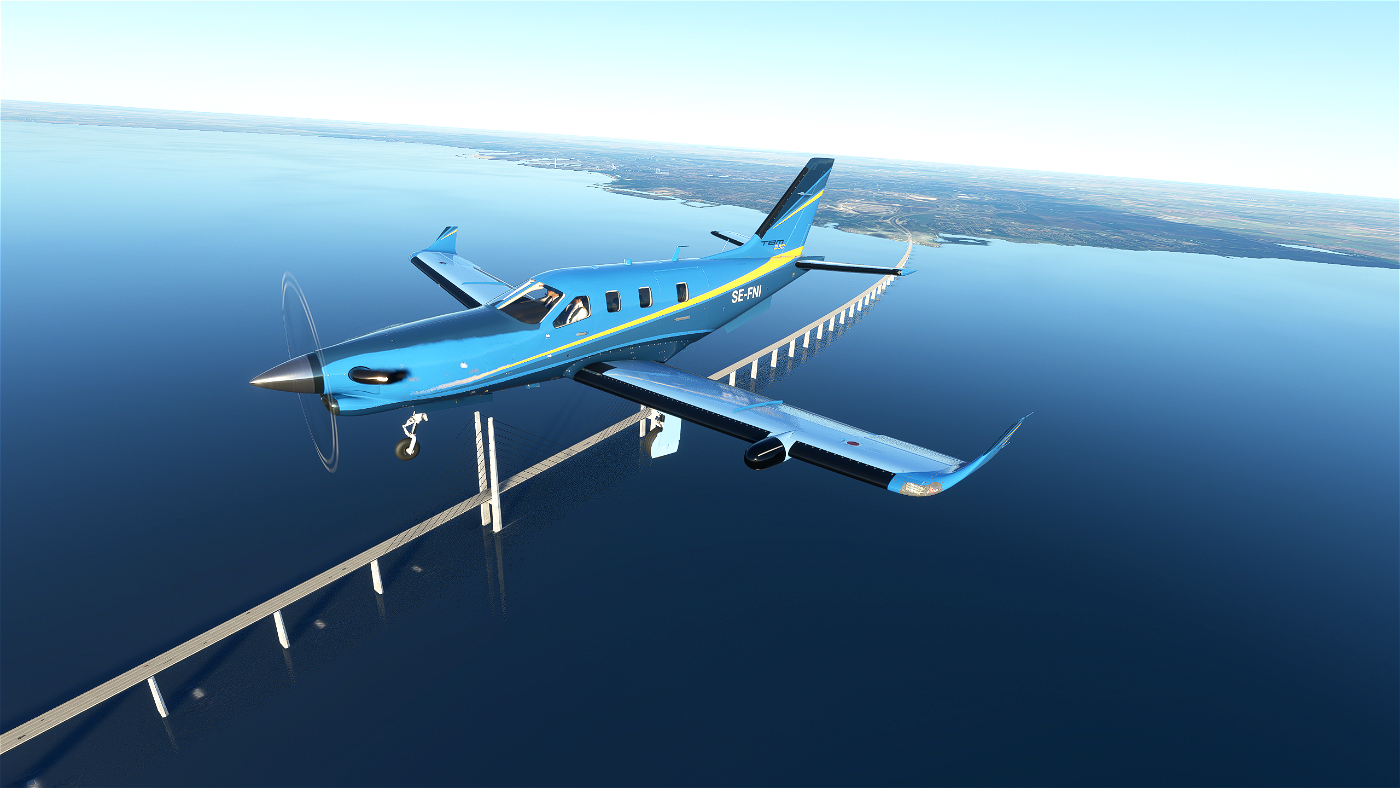
There is no Bluebird Air company in the real world, yet :) The screenshot of the blue/yellow variation is from the Kebnekaise area in northern Sweden, the blue/red is from Narvik in Norway nearby. This is an area I really recommend you to visit both virtually and IRL. A flight from Narvik (ENNK) in Norway to Kiruna in Sweden (ESNQ) takes you over some beautiful mountain terrain that Sweden and Norway share... By the creek under the nose of the plane in that first screenshot, I have been sipping whisky in the midnight sun with some friends when we climbed Kebnekaise. It is the highest mountain in Sweden - but not not that high so you should be able to get over it in any aircraft ;) There was however a sad crash there in 2012 during the NATO excercise Cold Response, with a C-130 from the Norwegian Airforce that crashed into Kebnekaise at 6600 feet on route to Kiruna (ESNQ) from Evenes (ENEV).
The most interesting part about this livery might be for other creators as I included the gimp source project file where I have done channels for almost all the different parts. Just select a channel and then create a selection from it... So with that as a template it gets a lot easier to change it to other colors of your liking...
Quick howto for new livery creators with Gimp - using my file as a template:
I incuded my project files in the directory "GimpSource" in the root folder of the zip-file. They are not needed in your community folder.
Open the "TBM_930_AIRFRAME_PLANE_ALBD.PNG_Source.xcf" file. There are some different layers including the "TBM930_Plane.png" layer from the template by R1NS3 that I used as a starting point for my livery - thanks for that!. This can be used to see the geometry of the plane but do not include it in the export. That goes for the layer with strong colors in the "Debugging" layer group - used to find missing parts ;)
You can now go to the channels tab in Gimp and for example select the channel called "Elevator trims". Right click and select "Channel to selection". Now select the layer "Bluebird Base". Pick a color and use the paintbucket tool to change the color of just the elevator trims.
Select "export as" and select to export as a png to the "TBM_930_AIRFRAME_PLANE_ALBD.PNG" file. Make sure that the layers "Bluebird Base" and both "TBM_930_AIRFRAME_PLANE_ALBD.PNG.DDS" layers are enabled. One of them is "above" the Bluebird Base and is set to "multiply down" on the underlaying layers adding some detail. I also recommend having the "Soft tips" on that rounds the light blue color of the wings near the wingtips.
Why not export to directly to DDS? Because Gimp will not include all layers unfortunately. So after that open the .PNG file and select export once again - now as a DDS-file to the final "TBM_930_AIRFRAME_PLANE_ALBD.PNG.DDS" file. Select BC3 / DXT5 compression and "generate mipmaps". Other settings at default. This file should be in the actual community folder: [path to community folder]\livery-tbm930-bluebird-red\SimObjects\Airplanes\Asobo_TBM930-BLUEBIRD\TEXTURE.BLUEBIRD-RED\TBM_930_AIRFRAME_PLANE_ALBD.PNG.DDS.
The other files in the "GimpSource" folder can be wherever...
You will probably also be interested in changing the "TBM_930_AIRFRAME_DECALS_ALBD.PNG.DDS" file that are the decals on the fuselage body, fin, wingtips. Same procedure for them but as that is only one layer you can export directly to DDS.
Done.
Some advice - use rather dull colors. The shaders in MSFS will spice them up so too strong colors will be radioactive in the sim - as can be seen in many liveries :)


Very nice, thank you.
2 years ago
fStopper
3 years ago
mazex